


Materials:

Small rubber bands. You can find them at places like Sally Beauty. You can also buy ones online specifically for dog bows (thats what these ones are). OR if you are a nerd like me you can use the rubber bands that go in your mouth when you have braces or a retainer haha

Plastic rhinestones

Something skinny and long, such as a crochet hook. You can also use a screwdriver, a pencil, a paintbrush, etc etc (you get the idea)

Two types of ribbon. I'm using an opaque fatter ribbon and a skinnier silk ribbon.
Cut (2) pieces of the fatter ribbon 5 " and
Cut (2) pieces of the skinnier ribbon 4"
Tutorial:

First, place the rubber band on whatever you are using as your "something skinny" - In my case it is a crochet hook

Fold the ends of the smaller piece of ribbon back and together so you have something that looks like a loop.
Fold it in half so the ends are overlapping in the middle.

This is what you should have now


Repeat the same step for the larger ribbon. The most difficult part of this is you have to hold the smaller piece of ribbon with two fingers, while folding the larger ribbon at the same time. Or if you have a nice boyfriend or fiancé you can make them hold your smaller ribbon while you are folding the large ribbon

Place the smaller folded ribbon on top and in the middle of your larger folded ribbon

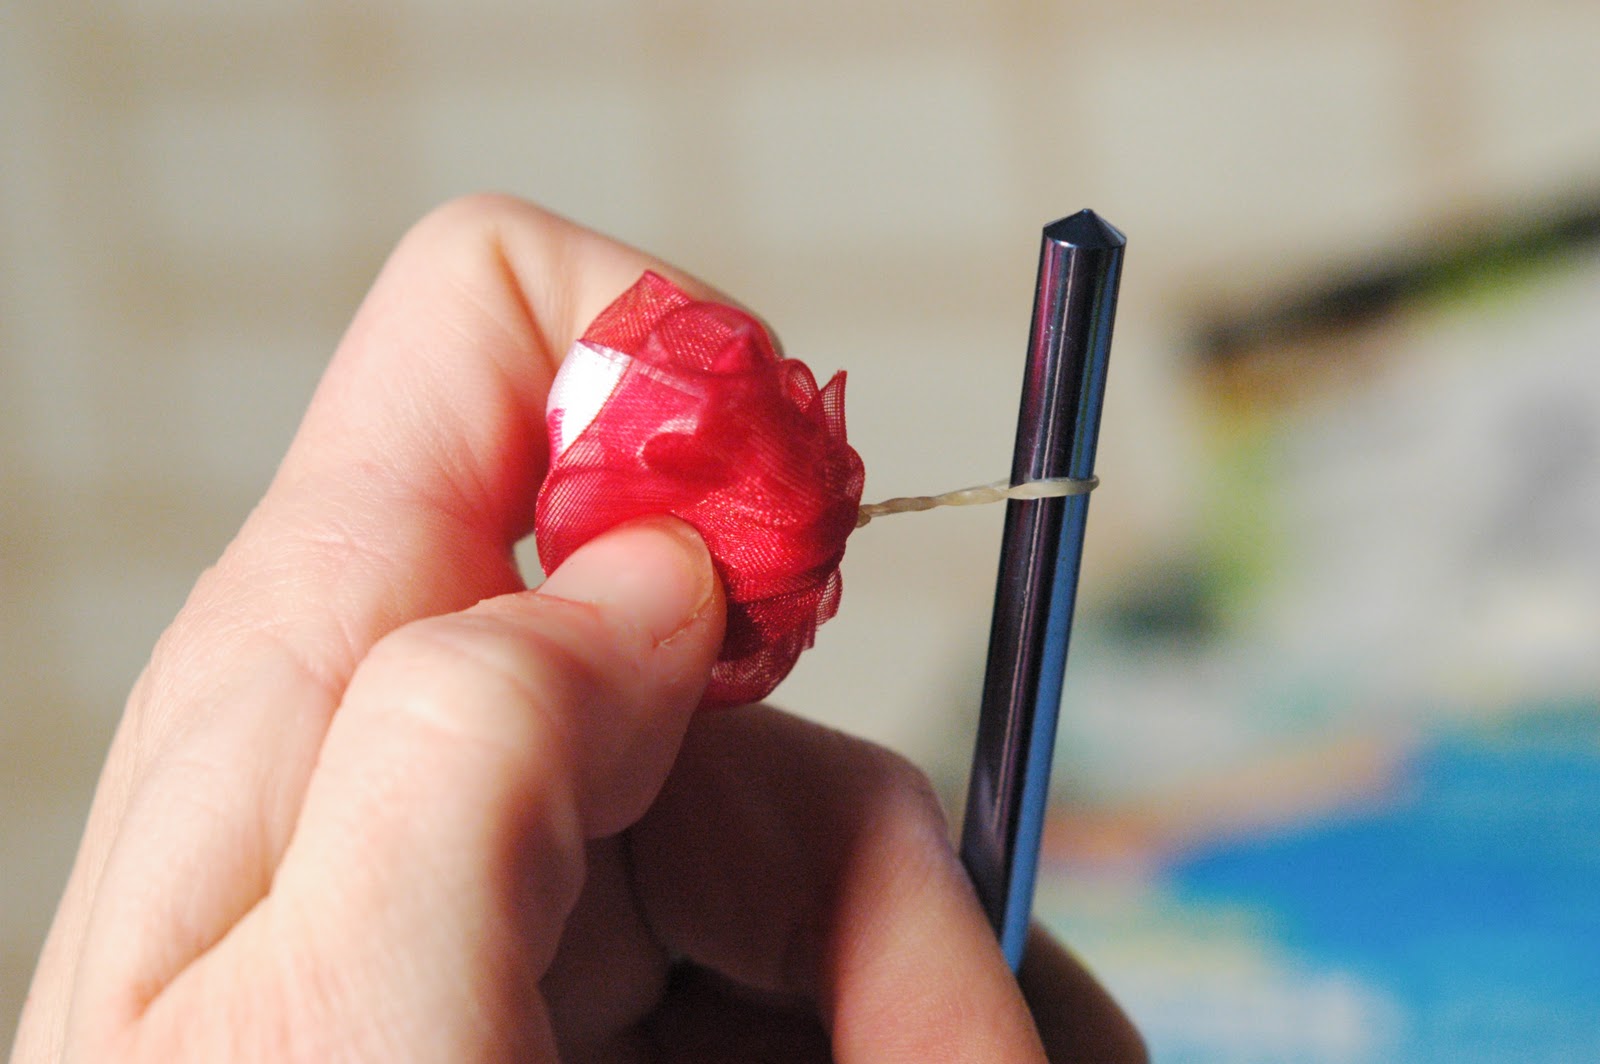
Place the two pieces of ribbon together on top of your crochet hook (or whatever you are using as a substitute). Make sure the ribbon is centered so the overlapping edges are directly over your crochet hook and the rubber band is below your pieces of ribbon.

While holding your ribbon in place, pull the rubber band out and then over the tip of your crochet hook.
Use the photos above and below as a reference so to what you should have now.

*Note how the rubber band is "attached" to the crochet hook in two places


Pull the BOTTOM part of the rubber band UP and OVER the top of the crochet hook and let go so it is now above the top part of the rubber band. After you do this there will only be one loop of the rubber band that is hooked on the crochet hook now.
Fold your bow in half and pull gently to tighten the rubber band. You are probably going to have to re-adjust the ribbon at this point making sure the rubber band is directly in the middle of the ribbon.

After you have pulled the ribbon to tighten the rubber band you can pull the bow off of the crochet hook.
See how there is a perfect little loop on the back now for attaching it to your dogs hair? THIS is the reason why this method of bow making is the best! This loop ensures that the bow will stay straight and flat in your dogs hair! Other methods of just tying the rubber band around the ribbon (as you would put a rubber band in your hair for a pony tail) make the bow flip around when you are trying to put it in your dogs hair and make it MUCH more difficult and sloppy looking.
This little loop is also perfect if your dog doesn't have long hair because you can just slide the loop over your dogs collar and use it as a super cute collar bow!

This is what your bow should look like now! Now all you have to do is hot glue a plastic rhinestone!

And there you go! The PERFECT Dog Bow!
Have fun making your furry child some fancy hair accessories!
Thanks for the tutorial! I just had to send this to my mom and sister, who both have shih tzus. :)
ReplyDeletehey have you tried using the hook end of the needle? once the rubber band is over the bow, you just slide the hook down and under the bottom part of the band, no grabbing the band needed.
ReplyDeletehey have you tried using the hook end of the needle? once the rubber band is over the bow, you just slide the hook down and under the bottom part of the band, no grabbing the band needed.
ReplyDeleteMel, I actually haven't tried that! I feel so silly that I didn't think of that! Haha I normally use my hemostats to make dog bows but I thought it would be a little weird to make the tutorial using hemostats ;-)
ReplyDeleteso cool
ReplyDeleteThis is very great and informative post. I have two dog name miska and lomi and I make only natural homemade food for my dog. I create a blog about how to make dog bones. Now I’m looking some fresh dog food recipe like that one…..
ReplyDeleteThank you for this post super easy tutorial for us less crafty , I can now make the sweetiest bows ever for my pup.
ReplyDeleteThis is the easiest one I've found so far(and it's been a loooong look) I get everything up until the picture that shows back and front that's were I get confused. But great job.
ReplyDeleteI use a latch hook it works perfect. also a groomer
ReplyDeleteThis comment has been removed by the author.
ReplyDeleteThanks a million Author
DeleteThanks a million Author
DeleteCute tutorial! I have tried many ways, found a great way with part of paperclip (for a double knot). But sell the bows i make to local shops and to a few customers who a repeat buyers. i ve just used my fingers :) yeah, they hurt. and my cuticle is so far back on my pointer finger its not even funny! :D
ReplyDeleteThis comment has been removed by the author.
ReplyDeleteThis is my favorite tutorial by far! Thank you so much.
ReplyDeleteHow do you get the 'knot' in the back to stay once it is finished? I may not be doing it correctly but the knot is simply the two sides of the band through a loop, making it very easy to slip out and undo the whole thing.
Also, I learned the hard way that the smaller the tool you use, i.e. crochet hook as shown, the easier it is. A standard pen was just too big.
Caroline, How simple is that!! Thank you so much for your very clear instructions and your so cute web site ;o) Now you need to tell us how to put the bows in the pets hair behind the ears. I have a tiny Chihuahua (2 lbs.) and would love to see her in bows. (also explaining how you twist the RB into their fur so it is not to large and falls out). THANK YOU!!
ReplyDeleteThanks so much........my granddog Zuzu is a girlie-girl....she's going to look adorable in the bows!
ReplyDeleteVery nice.
ReplyDeleteTwo things: twisting the elastic a half-turn when you pull it up to put over the front of the bow and onto your tool makes an 'X' in front of the ribbon which is VERY HELPFUL, and the elastic will then NOT slide off the sides of the bows (which I'm sure you know it can without the 'X').
And the organza ribbon, your fat one, is not opaque - that would mean that you cannot see through it. ;)
It is fairly transparent. (There is the word 'translucent', but that means you cannot see detail through it, and you can see very good detail through most sheer organza.)
Great tutorial for so many who are just starting, very clear and helpful!
Wow really! She’s making a lot of small dog “parents” knowledgeable and saving us all a lot of $$ we would spend at the groomers! Why does there always have to be a “Karen” to ruin a perfect tutorial!
DeleteTo the author/creator “Thank You”. I have my very first small (4#) female Morkie (only had boy Rottweilers, so need for bows!). Ive got a lot to learn about raising a little princess!
I am a groomer also and I make my two ribbons in the shape of a cancer ribbon,then stack them as you did and do the same procedure but with hemostats(lol) and mine come out fluffy on top and with tails.
ReplyDeleteI am a groomer also and I make my two ribbons in the shape of a cancer ribbon,then stack them as you did and do the same procedure but with hemostats(lol) and mine come out fluffy on top and with tails.
ReplyDeleteBuy Knots products at low prices in India - Shop online for Knots products on Aatachi. Get Free Shipping & CoD options across India.
ReplyDeleteVery good information is given in this blog...Everyone likes to have pets, if you want to keep it,
ReplyDeletethen we are the best pet's shop and best breeders in Dehradun,Uttarakhand(India).
Great Post! Thanks for your share! You can get ribbons with 196 colors and 19 sizes for choice from Yama Ribbon with the best deal!
ReplyDeleteChow Chow Puppy in Delhi NCR
DeleteChow Chow Puppy for Online Sale in India
Great Post! Thanks for your share! You can get Satin Ribbon Wholesale price only from Yama Ribbon!
ReplyDeleteGreat Post! Thanks for your share! We are Wholesale Satin Ribbon Supplier that you can get ribbons with 196 colors and 19 sizes with the best deal from!
ReplyDeleteWas a good read till all the spam
ReplyDeleteWow, cool post. I'd like to write like this too - taking time and real hard work to make a great article... but I put things off too much and never seem to get started. Thanks though. Dog diseases and care
ReplyDeleteThis is very interesting, but it is necessary to click on this link: What are the benefits of CBD oil for pets?
ReplyDeleteWait so what was the reason we had to cut 2 pieces of each ribbon if we only used 1 piece of each ribbon
ReplyDeleteI am assuming if you want a bow on each side
DeleteHi. I’m also a groomer and I make my own bows. But how doesn’t the hot melt melt the elastics. I always glue mine with craft glue which goes opaque when dried. Thank you 🐾
ReplyDeleteNice articles and your information valuable and good articles thank for the sharing information puppy bathing guide
ReplyDeleteHandpicked Handmade Hair Bows & Quality Scrunchies Online
ReplyDeletean exclusive range of handmade hair bows featuring creative designs and premium workmanship. The scrunchies offer comfort and style for daily wear. Buy bows scrunchies online to elevate your accessory collection effortlessly.
Handmade hair bows
buy bows scrunchies
Nice articles and your information valuable and good articles thank for the sharing information wholesale dog accessories
ReplyDelete